As I’m in the process of writing a trip report on my trip to Kuala Lumpur and Bangkok in February, a reader asked how I took pictures with so few obstacles. It happens that I purchased a new camera equipment immediately before this trip (as in, I drove to the camera store before going to the airport). I thought it would be worth covering both the camera that I use and my “technique,” such as it is, in the same post.
What Are You Trying to Accomplish?
Everyone has different standards for their photography. Know what you care about before buying another camera.
I was on a fam trip to Singapore last spring, and nearly every other writer in the group was lugging a big camera over his or her shoulder. They were writing for print magazines or uploading stock photography to Getty Images.
I’m writing an online travel blog. More specifically, I write about miles and points. I am not trying to persuade you to leave your desk job and travel the world. I don’t care about catching the sunrise from a hot air balloon over the temples of Myanmar. As long as I can get a decent photo of a well-lit hotel room in 800 pixels, I’m pretty happy. A smart phone will suffice.
If you are looking for photo clipping path service, then look no further! A good company like Zenith Clipping is a clipping path service provider company in Bangladesh which offers the best quality clipping paths. They are a well-reputed top-ranked image editing company serving since 2010.
Avoid Overkill
I don’t want to rely on a smart phone all the time because there are legitimate challenges in some environments. Most airplane meal service occurs when the cabin lights are dimmed. Some of the most dramatic photos of hotel rooms and suites involve a high dynamic range between the dark interior design and the bright sunlight outdoors. Smart phones are getting better, but they generally suck at taking these photos.
Smart phones also damage more easily than a real camera. My iPhone 5s has some kind of fog over the front lens, so selfies are out. The rear sensor has a small distortion in one corner.
Better doesn’t mean it has to be the best. I don’t necessarily want a giant camera that calls attention to itself or that requires an extra bag. If I can fit a good camera in my pocket, that makes it easier to whip out in the middle of a first class lounge without calling attention to myself.
During my first trip to the temples of Angkor Wat, I spent half the time fiddling with the settings. The pictures I took with a borrowed Samsung Galaxy S5 turned out better. We get back to that problem of dynamic range, and while a DSLR can handle that pretty well, you need to know how to use it. Most phones adjust automatically.
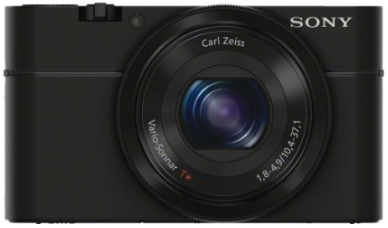
Why I Bought the Sony RX100
Given my DSLR was too complicated and my iPhone was starting to fail, I packed an old Canon point-and-shoot for my trip. I realized when I arrived at the Concourse Hotel at LAX that the camera would no longer hold a charge. Ben at One Mile at a Time has been dithering for months about whether to buy a new camera, and many people have suggested the Sony RX100, so I set out to Samy’s Camera the next morning to buy one that morning before my flight.
I like that it’s small enough to fit in my pocket (barely). I like that it has a big display on the back. I like that it doesn’t have too many buttons. Even my old Canon had more buttons than this thing. There are manual ISO settings and stuff like that, but I almost never deviate from full automatic.
My favorite feature is that it can take multiple photos at once if it detects dim light or motion. It then processes these photos or does something techno-wizardly to avoid blur and enhance the colors in your shot. This sometimes causes a slight delay while it processes the images, so if you’re in a hurry you can also set it to take just one photo.
Remember I said that a smartphone was good enough for my needs, but this camera does take better photos than my smartphone. Why settle for good enough?
Which Model Is Best?
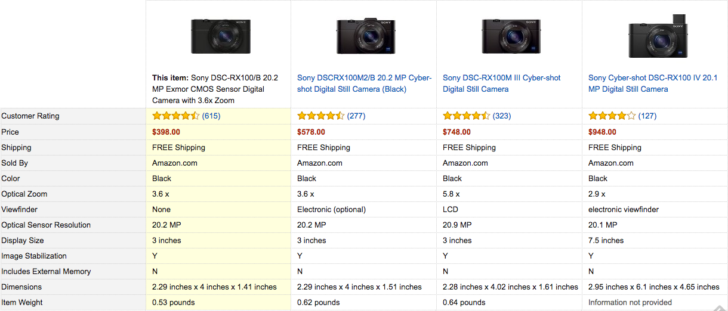
There are four models of the Sony RX100. Search for the camera online and you’ll find a lot of reviews that attempt to recommend one or another to curious customers. Here’s my amateur summary:
Mark I ($398 on Amazon) — base model
Mark II ($578 on Amazon) — tilting LCD, hotshoe, and WiFi
Mark III ($748 on Amazon) — better processor, better video, better frame rate and shutter speed; removes hotshoe; LCD now flips 180° for selfies
Mark IV ($948 on Amazon) — better processor, better video, better frame rate and shutter speed
What does all this mean? Clearly the Mark I is still pretty good since Sony continues to sell it, and I’ve seen more than one online review claim it’s better than nearly every other point-and-shoot camera. If you’re the type of person who likes to have a hotshoe, then the Mark II is for you. (If you don’t know what a hotshoe is, then you don’t need one.) If you really like selfies then you should get a Mark III, although everyone will hate you. And if you have more money than sense, you should buy a Mark IV.
They all get great reviews. This isn’t a situation where buying a cheaper model will result in crappy photos. Because I am not a camera expert, I purchased the Mark I. If you’re thinking about buying the Sony RX100 and — like me — aren’t sure which model is right for you, then you should probably get the Mark I.
If you know more about cameras than I do, then you might want a different model, but you don’t need me to tell you which one best fits your needs.
How to Take Good Photos
The camera you use doesn’t matter nearly as much as some people think. How you use the camera is far more important. I see people with great cameras who take shitty photos, and I see people with bad cameras take great photos. Taking a picture with any camera requires some finesse. As I said, I don’t really care enough to enter my pictures in competitions or try to sell them to other writers, but I have found three rules that usually result in a better photo.
First, turn off the flash. Your eyes have an amazing dynamic range. Cameras aren’t as good as your eye, but brightly illuminating the scene from a narrow source just screws with the color. Most cameras with small sensors, like your cell phone, work around the issue by aggregating nearby pixels. The resulting image has more static. Cameras with a larger sensor that can detect faint light are going to do better without affecting resolution. That’s one reason I bought the Sony RX100. If I need to, I’ll adjust the colors later in Photoshop.
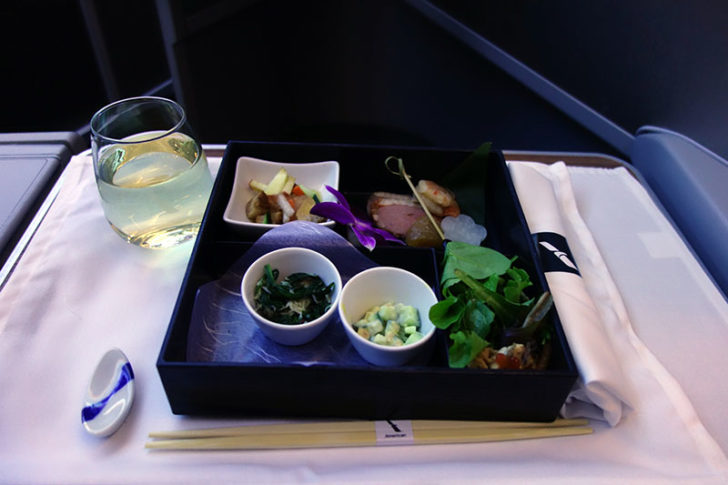
The photo below, for example, was taken with dimmed cabin lights during a redeye flight, but it almost looks like a daytime flight with the window open.
Even if you don’t have a great camera, keep the flash off. I’d rather have a grainy image that more accurately reflects the scene as I saw it with my eyes.
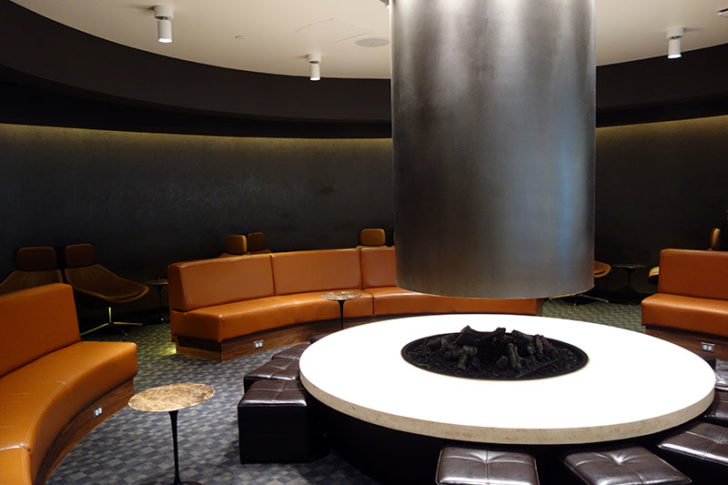
Second, frame the photo. Most people say to use the rule of thirds, which is simple enough. Put objects of interest in the top, bottom, left, or right third of the grid. Don’t center things all the time. If you’re taking a shot of a landscape, put the horizon along the top or bottom third. Notice that I put the fireplace on the right in this photo of the oneworld business class lounge at LAX.
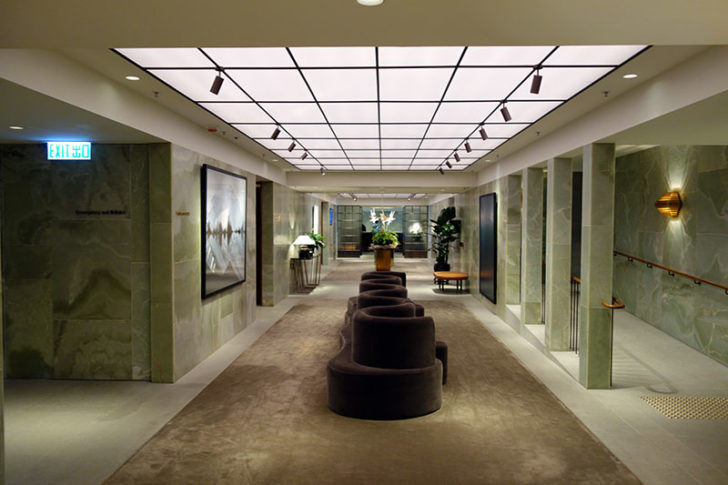
Another piece of advice is to hold the camera level so all vertical lines are parallel. My wife tells me this is “architecturally correct” and photos do end up better than if I tilt the camera. (The RX100 has a level sensor that helps with this.) The photo below of Cathay Pacific’s The Pier first class lounge is a good example.
Third, be patient. Unless you want a bunch of people in your photo of the lounge, wait for them to move out of the way or find another perspective. Ben says that he tries to board the airplane first, before there are other people milling about. I’m not that worried but I do sometimes take a photo of another empty seat if I can’t take a picture of my own without bothering a neighbor.
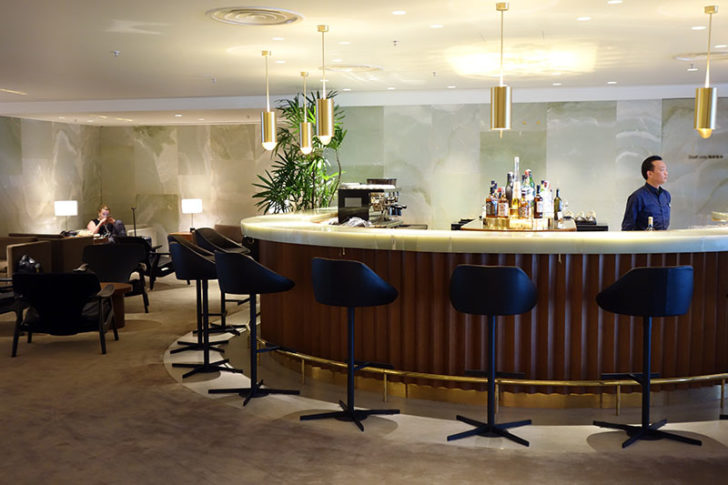
I have much more time to take photos of an airport lounge or hotel room than I do in an airplane that is boarding quickly. Usually I take a walk around to get a sense of the place. I may not even take any photos of the lounge until I’m leaving. I particularly like this photo I got when it looks as if the bartender isn’t paying attention. That kind of casual, real-life photography is just as interesting as an empty room.


