Japan just opened up for visa-free travel recently and I jumped at the opportunity to visit Tokyo Disneyland and DisneySea for a few days. I spent four days at the parks and stayed at two different hotels while the prices and crowds were still low. And though I’m no expert by any means, I did learn a few things that I wanted to share with you guys. A lot of the guides out there are all outdated, posting information from way before the pandemic, so I wanted to share information that was more current in case anyone was planning a trip for late 2022 or early 2023.
In this post, I’ll talk about the logistics of planning a trip; from which airport to fly into and how to get around to which hotels to stay at depending on your budget. I’ll also add a few other tips and tricks you need to know to get the most out of your vacation. But to be clear, this isn’t a review of the parks, rides, or food. There are plenty of YouTube videos and reviews of the parks already. This post is simply to help you prepare for your trip and make the most out of your time in Tokyo. I hope you find it useful.
Tokyo Disney Resort Location
The Tokyo Disney Resort, which refers to both Tokyo Disneyland and Tokyo DisneySea, is not actually located in Tokyo proper. The resort and its surrounding hotels are actually located in the city of Chiba, which is southeast of Tokyo center. This area is also referred to as “Tokyo Bay.” This is important to note as the two major airports have agreements with the airport taxi companies to provide a fixed rate from the airport to your hotel in Tokyo but this won’t apply to hotels in the Chiba area.
Additionally, you should know that once you’re in Tokyo Bay, it’s not exactly convenient to get to “downtown” Tokyo. By train, it will take you approximately 50 minutes to get from the Tokyo Disney Resort area to Shinjuku, and cost you 420 Japanese Yen ($2.82 USD). Or you could hire a taxi, which will take about 30 minutes and cost you about 10,000 to 11,000 JY ($67 – $73 USD).
As a point of reference, the exchange rate for today’s date (October 17, 2022) is 148 Japanese Yen to $1 US Dollar.
Which Airport to Fly into?
There are two major airports that serve the Tokyo area: Tokyo Narita and Tokyo Haneda. Narita is a huge airport with plenty of connections to almost every major city in the world. Flights to Narita tend to be cheaper than flights to Haneda as there are significantly more options. Whereas Haneda is a smaller airport with fewer connections, but it’s more manageable and closer to the center of Tokyo than Narita. If you’re debating between flights, I would take the one that gets in the earliest. For example, if flying into Narita will save you $100 but gets you in at 9:00 PM, as opposed to 4:00 PM in Haneda, I would take the Haneda flight.
Transportation To/From the Airport to the Tokyo Disney Resort
The easiest way to get to/from Haneda or Narita Airport to the Tokyo Disney Resort area is with the airport limousine. It’s called the airport limousine but it’s really just a shuttle bus so don’t expect anything fancy. The airport limousine from Narita will take about an hour and cost 2000 JY whereas the airport limousine from Haneda will take about 30 minutes and cost you 1000 JY. Both airport limousines from Haneda and Narita will drop you off at Mahaima Station, which is the main train station for the Tokyo Disney Resort area. Some airport limousine routes will also drop you off at one of the major hotels but you need to check their specific schedules and routes for more information.
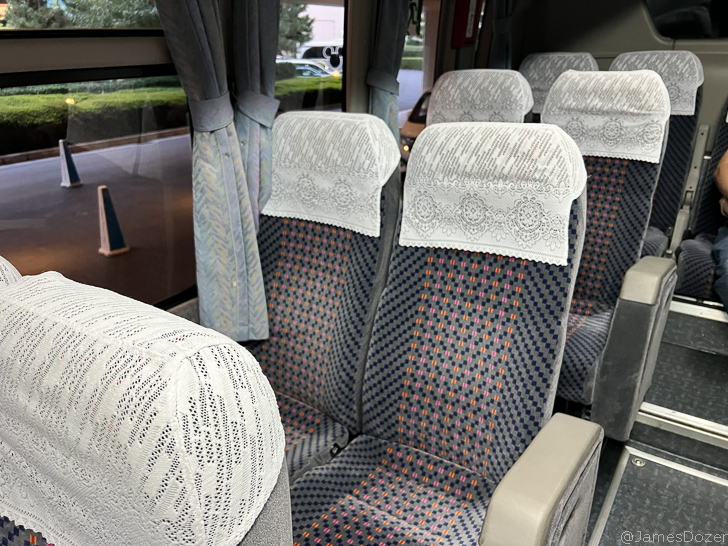
However, keep in mind that the airport limousine doesn’t run all night. Depending on the day, it may stop running as early at 4:00 PM. So if you’re getting in later than that, you may have to find alternative transportation such as a train or taxi. Trains run till about midnight daily and Taxis run 24/7. A taxi from Haneda to the Tokyo Disney Resort area will take 30 minutes and cost you about 10,000 JY ($67 USD). A taxi from Narita will take an hour and cost you about 20,000 JY. You can check the timetable and routes for the airport limousine here.
Mahaima Station is located right next to Ikspiari, which is Tokyo Disney’s version of Downtown Disney in California or Disney Springs in Florida. To get from Ikspiari to Tokyo Disneyland, Tokyo DisneySea or other Disney hotels, you need to take the monorail aka “Disney Resort Line.” However, unlike the monorail at the other Disney parks, this monorail is considered public transportation and you have to pay for it. It’s not much, only 260 JY per adult (12 Y/O and older), per trip, but it does add up if you’re going back and forth a lot. The monorail runs on a continuous loop from the Resort Gateway Station at Ikspiari to Tokyo Disneyland Station to Bayside Station (where the majority of hotels are) and finally to Tokyo DisneySea Station and back.
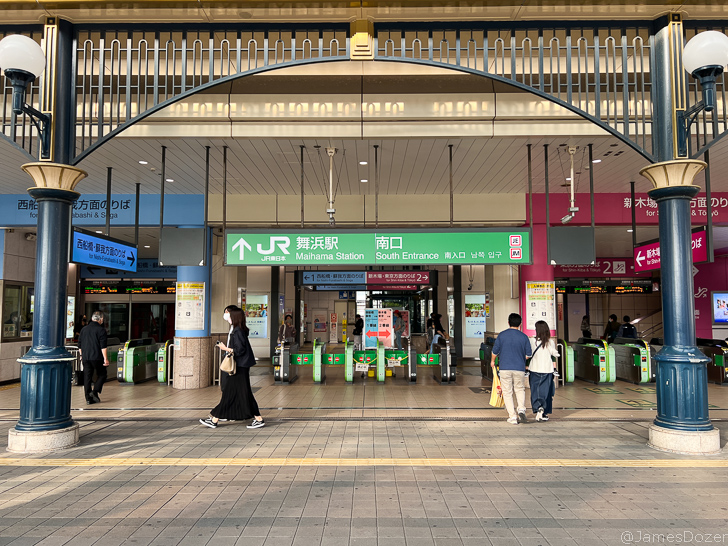
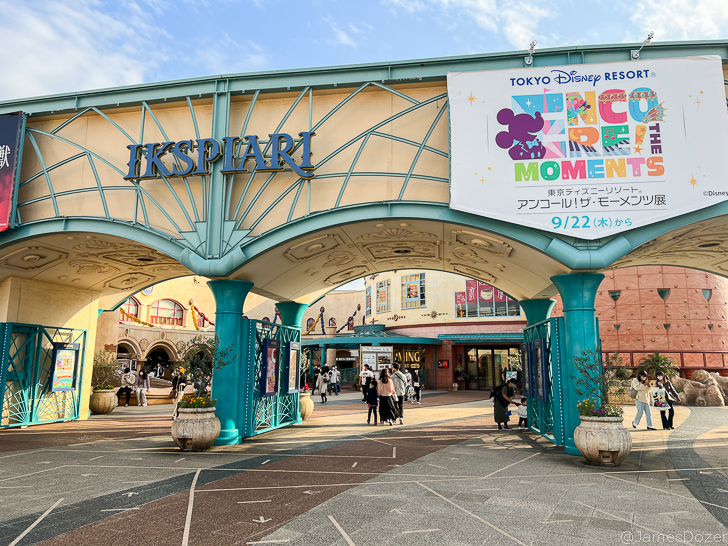
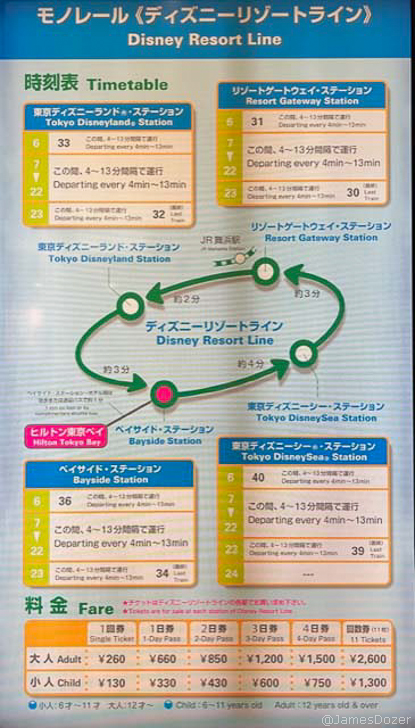
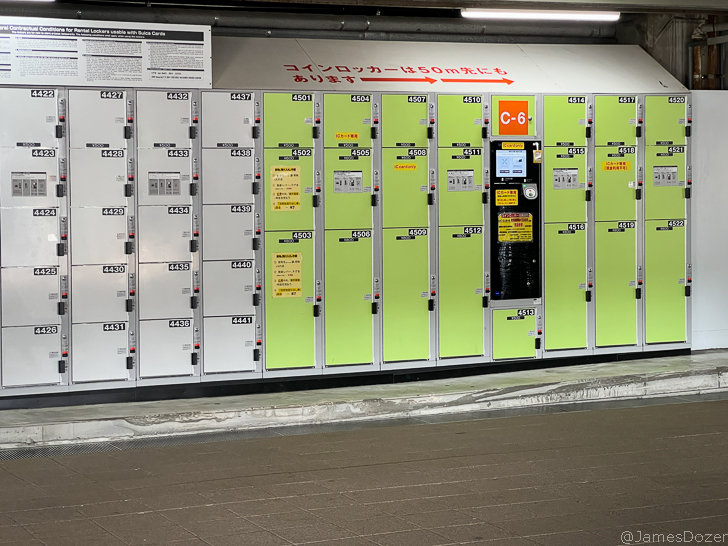
If you’re going directly to the parks and need a place to store your luggage, there are plenty of public storage lockers to rent at any train station, including Maihama.
Pro tip: the Disney Resort Line monorail ticket booth is cash only so make sure to bring small bills or change with you.
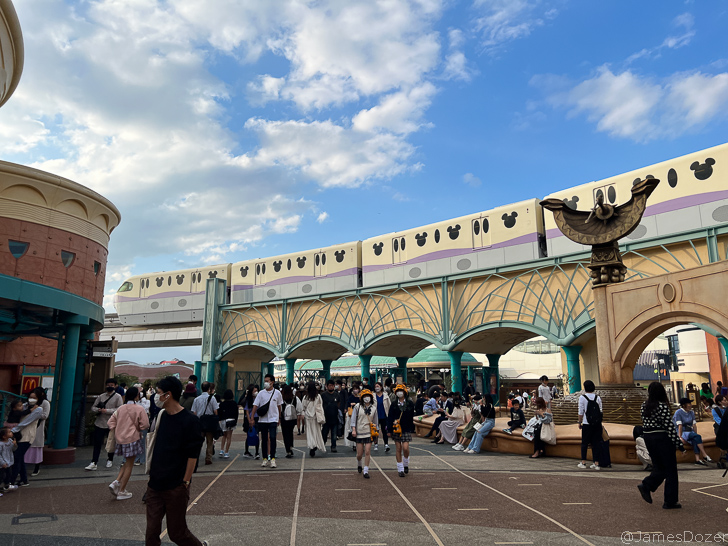
Where to Stay for Tokyo Disney Resort
Where you stay at will largely depend on your budget. If money is no object, then you can stay at the Tokyo DisneySea Hotel MiraCosta, which is the only Tokyo Disney Resort hotel that is located in one of the parks. The other Tokyo Disney Resorts hotels are all located outside of the parks. The Tokyo Disneyland Hotel is the next best hotel and it’s located right outside the gates to Tokyo Disneyland. The Disney Ambassador Hotel is located next to Ikspiari and the Toy Story Hotel is located next to Bayside Station. The Tokyo Disney Celebration Hotel is located in a separate part of Tokyo Bay, about 20 minutes away by bus.
As a point of reference, the Tokyo DisneySea Hotel MiraCosta, Tokyo Disneyland Hotel, and the Disney Ambassador Hotel are all considered Deluxe Hotel types. The Toy Story Hotel is considered a moderate hotel and the Tokyo Disney Celebration Hotel is considered a value hotel.
There are many benefits to staying at one of the five Disney Resort Hotels but the most significant perk is the “Happy Entry,” which will grant guests early admission to the parks. This perk only lets you in 15 minutes prior to the general public but this allows you to hit one, maybe two, of the major attractions before everyone else.
If you want to save some money, I would recommend staying at one of the official Tokyo Disney Resort Partner Hotels instead. These hotels are much cheaper than the Disney hotels but they don’t offer any real perks other than a shuttle ride to the parks. However, some of them are conveniently located near the Disney Resort Line monorail so transportation will be much easier than staying outside of Tokyo Bay. These official Tokyo Disney Resort Partner Hotels include the Grand Nikko Tokyo Bay, Hotel Okura Tokyo Bay, Hilton Tokyo Bay, and others.
On this trip, I stayed at both the Disney Ambassador Hotel and the Hilton Tokyo Bay and they were both great. I will have my hotel reviews up within the next couple of weeks.
Other tips and tricks
Fastpasses – Tokyo Disneyland and Tokyo DisneySea got rid of their Fastpass machines and replaced them with a “Disney Premier Access” virtual queue. Just like the Lightening Lane passes at Disneyland and Disney World, you now have to pay to bypass the standby line at certain attractions such as Toy Story Mania and Soaring: Fantastic Flight at Tokyo DisneySea and the Enchanted Tale of Beauty and the Beast at Tokyo Disneyland.
However, there is one ride that will still give you a free “Fastpass” and that is the Haunted Mansion. To get your free Fastpass, you must use the Tokyo Disney Resort app to click on the Haunted Mansion ride. Select “Standby Pass” and it will assign you a time to return later on in the day. You can grab this free Fastpass as soon as the park officially opens for the day.
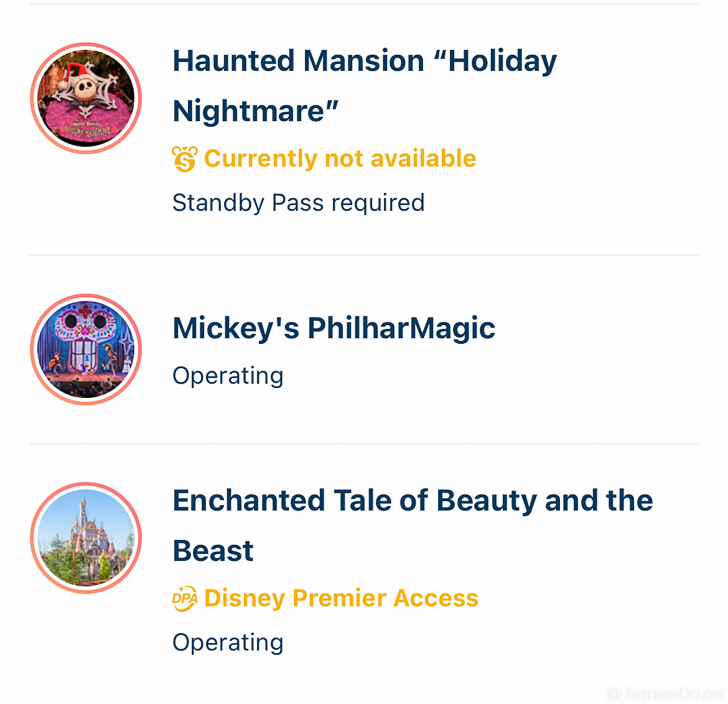
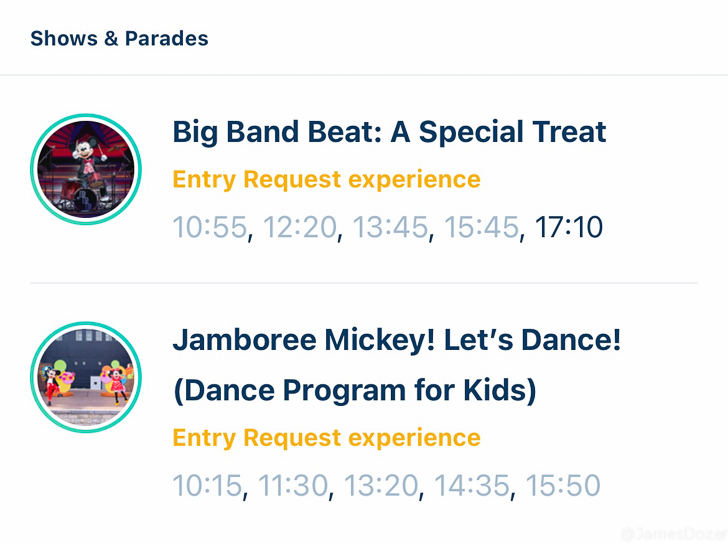
Tokyo Disney Resort App – Speaking of the app, you really should download it and link your tickets to the app. This will allow you to get the Haunted Mansion Fastpass, purchase Disney Premier Access passes and view ride wait times. But more importantly, you will need the app to watch one of the big shows such as Jamboree Mickey! Let’s Dance!, Mickey’s Magical Music World and Club Mouse Beat at Tokyo Disneyland, and Big Band Beat at Tokyo DisneySea.
Now, here is the one thing I don’t like. These shows are so popular that they can’t let everyone in and they don’t offer standby lines for them. In order to watch one of these shows, you have to “request entry” in the app and select the show and time you want. Once you make your selection, it will automatically put you in a lottery system. If you are selected for the show, you will be automatically assigned seats. If you are not selected for the show, you are not allowed to try again for the rest of the day. You can try for other shows but you can only try once per show. On my trip, I was only able to get one of the three shows I wanted to watch and there was no standby option to get a “second” chance at catching the shows.
Cash and credit cards – For such a developed country, Japan is really behind on cashless payments. Cash is still king and you will definitely need cash with you when exploring Japan. However, credit cards and “tap to pay” is widely accepted at the Tokyo Disney Resort and the only thing I needed to pay with cash was the Disney Resort Line monorail ticket. I was able to pay for almost everything else with my Apple pay or my Suica Card.
Suica Card – This is a metro card to pay for train/subway/bus rides in Japan. But surprisingly, you can actually use it to pay for more things than just transportation. You can use it at convenience stores in Japan and all the restaurants/shops at the Tokyo Disney Resort. This is convenient as you can load your Suica card with however much money you want from a credit card and then use the Suica card to make your daily purchases. This is handy if your credit card charges a foreign transaction fee as your credit card will only be charged each time you load your card and not each time your Suica card is used.
If you’re an iPhone user, you can add a Suica card to your wallet very easily. Just go to your wallet, press the plus sign in the top right-hand corner and click on transit card. Scroll down to Japan and add the Suica card. Then use Apply Pay to add funds to your Suica card. Simple.
And that’s all the info I have for you right now. I hope you found it useful. Feel free to ask me any questions you want in the comments section below and I’ll try to answer them in a timely manner. Thanks for reading!
The other posts in this series include:
- Japan is open for visa-free tourism! Here’s what you need to know before going.
- American Express Centurion Lounge at LAX
- Review: ANA Economy Class, Los Angeles to Tokyo Haneda
- Review: Hilton Tokyo Bay, an official Tokyo Disney Resort hotel
- Review: Disney Ambassador Hotel, an official Tokyo Disney Hotel
- Beginner’s guide to visiting Tokyo Disneyland and DisneySea
- Review: ANA Lounge Tokyo Haneda
- Review: ANA Economy Class, Tokyo Haneda to Los Angeles
